Get the word out, you’re here, you’re open and you’re offering great food. Do it by posting to social media channels regularly to build a following be both consistent and persistent so your followers look forward to your posts and encourage them to engage with you and share your content to increase your following.
Every post should be supported with a good photograph, and with the advances of mobile cameras, you can get great results by doing this yourself. Do it a couple of times, and you’ll get the hang of it and likely to want to carry on experimenting with new dishes and promotions.
To get you started, we’ve created this practical guide specifically for foodservice photography.

Setting the Scene
Plating and Styling
For inspiration, start by researching your dish on Google Images and settling on the look you want to achieve, start with something simple yet effective.
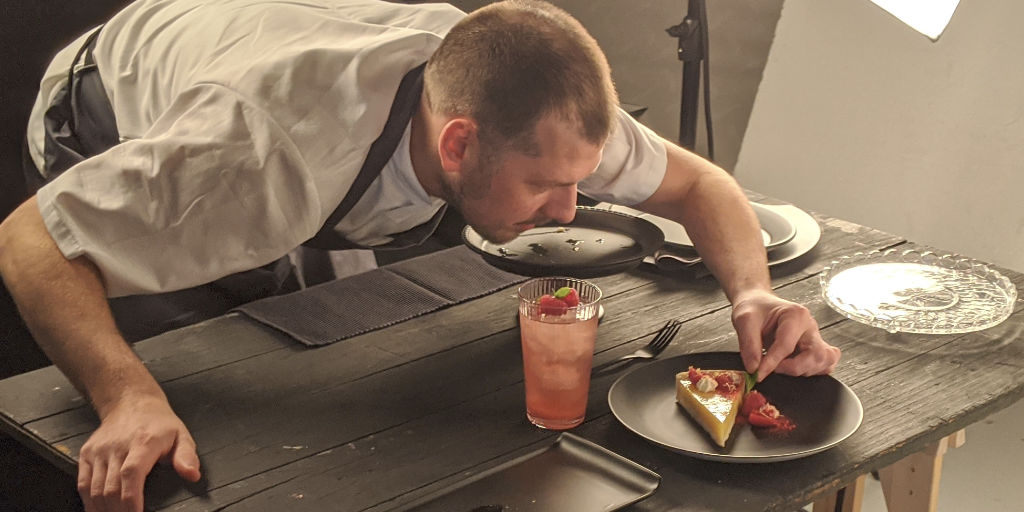
As a chef, you know how to make a plate look its best, but for photography, you’ll need to be extra vigilant as small flaws and drips will show up and ruin your shot. Ensure all fruit and veg is fresh and, for best results, shoot as quickly as possible after plating. Brush with oil or spraying with water vapour will make the food glisten.
Props
Take cues from the colours on your plate to add some theatre around the dish. Pull in seasonal props and raw ingredients for a fresh and colourful look. Make sure that the dish is the absolute focus and the props enhance the shot if not, remove them. Cutlery, bowls, plates, glasses and napkins are excellent props, and you’ll already have them to hand.
Theme
If you’re shooting several dishes around key dates or cuisines, why not create a theme to pull it all together. This will make it simpler to execute and be a more compelling visual. Arrange your first dish then move the props around or replace with some complementary ones.
You might also want to consider a step-by-step set of images from ingredients, though prep to cooking. This can add a bit of life to your campaign but take extra care to ensure the surroundings are clean and hygienic.
Human Touch
Having a person in a shot enhances the imagery builds rapport and empathy with the viewer by making it more of an experience. You don’t need a full shot of the diner, a server’s hand putting the plate down or holding cutlery can be sufficient. Again, pay extra attention to cleanliness and hygiene with clean fingernails etc.
The Brand
Ideally, you want to aim for a look-and-feel that defines you and that you can replicate so your customers and followers can identify with it. You might want to place your logo on the image, and many apps can do this.

Preparing to Shoot
Camera Angle
Finding the right camera angle will be determined by the look you are going for. Top-down is a bit dated but may work for your application, why not try face on and raised between 30-45 degrees so you get a good shot of the dish and there’s still some space for theatre.
Using a tripod will help you set up the best shot and repeat it for other dishes.
Rule of Thirds
One of the first things photographers learn is the rule of thirds. On your phone, you should have an option to display a grid of nine boxes, rather than shoot with the subject centred, try making the image more appealing by having the subject on the left or right thirds which will also give you a balanced shot. Have a look at the Digital Photography School for more detail on this.
Lighting
If you only do one thing, get the lighting right. Ideally, you should try for natural light from behind the camera (watch out for shadows). If it’s still too dark, add more lighting. You may want to try the camera flash, but this varies from phone-to-phone, better yet would be to get an LED Ring Light, there are options to suit all budgets – don’t forget to add the diffuser for a softer light.
Proportions
Consider how you will use the final shots. While shooting a portrait shot for Instagram may be great, it may not work so well with a mailer or digital menu. It may be wise to shoot both landscape and portrait formats to cover yourself.
Photo Editing
Your phone and many 3rd party apps (including Instagram) come with photo editors letting you crop, tweak colours and add artistic filters. They can help you squeeze some extra juice from your shots.
Start by getting the right crop, try zooming in to see if you can enhance the rule-of-thirds with a better balance and a more interesting shot. Filters tend to dampen the appearance of food. Instead, look for your Vibrance/ Pop setting and play with the dials to see if you can enhance the image – keep it subtle though, you want to get the food to look it’s most tasteful and the picture to still look natural.
When you’re ready to step up but don’t want the overhead of learning Photoshop, have a look and Luminar 4 for your PC, with a few clicks you can really enhance images to the next level.


